harbor(docker仓库)仓库部署 - 高可用
- 1. harbor高可用
- 1.1 方案说明
- 1. 双主复制
- 2. 多harbor实例共享后端存储
- 1.2 部署高可用(多harbor实例共享后端存储)
- 1. 服务器划分
- 2. 安装harbor(先部署一套Harbor,用于将其所有表结构导出)
- 3. 安装Postgresql
- 4. 安装nginx
- 5. 安装nfs
- 6. 安装redis
- 7. 部署harbor
- 8. 修改nginx配置
- 9. docker登录harbor
- 10. harbor修改
- 11. 修改nginx
- 12. docker推送
1. harbor高可用
目前有两种主流的方案来解决这个问题:
- 双主复制
- 多harbor实例共享后端存储
1.1 方案说明
1. 双主复制
所谓的双主复制其实就是复用主从同步实现两个harbor节点之间的双向同步,来保证数据的一致性,然后在两台harbor前端顶一个负载均衡器将进来的请求分流到不同的实例中去,只要有一个实例中有了新的镜像,就是自动的同步复制到另外的的实例中去,这样实现了负载均衡,也避免了单点故障,在一定程度上实现了Harbor的高可用性:
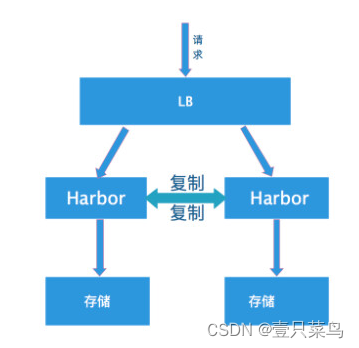
这个方案有一个问题就是有可能两个Harbor实例中的数据不一致。假设如果一个实例A挂掉了,这个时候有新的镜像进来,那么新的镜像就会在另外一个实例B中,后面即使恢复了挂掉的A实例,Harbor实例B也不会自动去同步镜像,这样只能手动的先关掉Harbor实例B的复制策略,然后再开启复制策略,才能让实例B数据同步,让两个实例的数据一致。
在实际生产使用中,主从复制十分的不靠谱,所以这里就不配置了。
2. 多harbor实例共享后端存储
利用共享存储和共享数据库来实现服务的高可用性和数据的冗余

这个方案在实际生产环境中部署需要考虑三个问题:
- 共享存储的选取,Harbor的后端存储目前支持AWS S3、Openstack Swift, Ceph等,在我们的实验环境里,就直接使用nfs。
- Session在不同的实例上共享,这个现在其实已经不是问题了,在最新的harbor中,默认session会存放在redis中,我们只需要将redis独立出来即可。可以通过redis sentinel或者redis cluster等方式来保证redis的可用性。在我们的实验环境里,仍然使用单台redis。
- Harbor多实例数据库问题,这个也只需要将harbor中的数据库拆出来独立部署即可。让多实例共用一个外部数据库,数据库的高可用也可以通过数据库的高可用方案保证。可选择的数据库包括PostgreSql,mysql等等。

1.2 部署高可用(多harbor实例共享后端存储)
1. 服务器划分
| 服务器 | IP | 说明 |
|---|---|---|
| k8s-harbor-01.xx.net | 192.168.17.220 | harbor1服务器 |
| k8s-harbor-02.xx.net | 192.168.17.221 | harbor2服务器 |
| k8s-harbor-lb-01.xx.net | 192.168.17.225 | nginx,redis,mysql,nfs |
我们将在k8s-harbor-lb-01.xx.net部署nginx,redis,mysql,nfs等服务,生产环境中应该分开,并且配置成为高可用
2. 安装harbor(先部署一套Harbor,用于将其所有表结构导出)
下载安装包并上传到服务器
tar xvf harbor-offline-installer-v2.7.2.tgz
cd harbormkdir certs	#证书
cd certs/
openssl genrsa -out ./harbor-ca.key		#key
openssl req -x509 -new -nodes -key ./harbor-ca.key -subj "/CN=harbor.xx.net" -days 7120 -out ./harbor-ca.crt	#认证
配置harbor.yml
cp harbor.yml.tmpl harbor.yml
[root@k8s-harbor-01 harbor]# egrep -v '^$|^#|^  #' harbor.yml
hostname: harbor.xx.net
http:port: 80
https:port: 443certificate: /opt/harbor/certs/harbor-ca.crtprivate_key: /opt/harbor/certs/harbor-ca.key
harbor_admin_password: 123456
...
启动harbor
./install.sh --with-trivy --with-chartmuseum
--with-trivy #镜像漏洞检测
--with-chartmuseum #Chart仓库服务
本节搭建的目的是导出postgresql数据库到其他服务器,接着导出数据库
docker ps
docker exec -it harbor-db /bin/bash
进入容器
## 执行 psql 进入数据库
postgres [ / ]$ psql
psql (9.6.14)
Type "help" for help.## 查看当前所有的数据库,postgres、template0、template1为默认数据库
postgres=# \lList of databasesName     |  Owner   | Encoding |   Collate   |    Ctype    |   Access privileges
--------------+----------+----------+-------------+-------------+-----------------------notaryserver | postgres | UTF8     | en_US.UTF-8 | en_US.UTF-8 | =Tc/postgres         +|          |          |             |             | postgres=CTc/postgres+|          |          |             |             | server=CTc/postgresnotarysigner | postgres | UTF8     | en_US.UTF-8 | en_US.UTF-8 | =Tc/postgres         +|          |          |             |             | postgres=CTc/postgres+|          |          |             |             | signer=CTc/postgrespostgres     | postgres | UTF8     | en_US.UTF-8 | en_US.UTF-8 | registry     | postgres | UTF8     | en_US.UTF-8 | en_US.UTF-8 | template0    | postgres | UTF8     | en_US.UTF-8 | en_US.UTF-8 | =c/postgres          +|          |          |             |             | postgres=CTc/postgrestemplate1    | postgres | UTF8     | en_US.UTF-8 | en_US.UTF-8 | =c/postgres          +|          |          |             |             | postgres=CTc/postgres
(6 rows)postgres=# \q
## 导出表结构及数据
postgres [ / ]$ pg_dump -U postgres registry > /tmp/registry.sql
postgres [ / ]$ pg_dump -U postgres notaryserver > /tmp/notaryserver.sql
postgres [ / ]$ pg_dump -U postgres notarysigner > /tmp/notarysigner.sql-U 数据库用户-p 访问端口-f 指定文件,和 > 功能一样-h 指定数据库地址-s 表示只导出表结构,不导数据
导出到宿主机
docker cp 8d69069a2cd7:/tmp/registry.sql ./
docker cp 8d69069a2cd7:/tmp/notaryserver.sql ./
docker cp 8d69069a2cd7:/tmp/notarysigner.sql ./
3. 安装Postgresql
yum install -y https://download.postgresql.org/pub/repos/yum/reporpms/EL-7-x86_64/pgdg-redhat-repo-latest.noarch.rpm
yum install -y postgresql13-server/usr/pgsql-13/bin/postgresql-13-setup initdb #初始化数据库# 修改远程访问配置
vim /var/lib/pgsql/13/data/postgresql.conf
...
#将 listen_addresses = 'localhost' 修改为
listen_addresses = '*'# 添加信任的远程连接,生产中不要添加0.0.0.0
vim /var/lib/pgsql/13/data/pg_hba.conf
...
host    all             all             0.0.0.0/0               trust
# host    all             all             0.0.0.0/0               md5
# 最后一列如果是trust,则登录pg不需要密码,若为md5,则需要密码# start and enable server
systemctl enable postgresql-13
systemctl start postgresql-13# 检查服务是否启动成功
#ps看进程 或 ss看端口号#给postgresql设置密码,增强安全性
su - postgres
-bash-4.2$ psql
## 直接写入新密码
postgres=# \password
Enter new password for user "postgres":
Enter it again:
postgres=# \q#验证
psql -U postgres -h localhost
Password for user postgres:
psql (13.14)
Type "help" for help.postgres=# exit#把全部信任改为指定IP
[root@k8s-harbor-lb-01 ~]# tail -3 /var/lib/pgsql/13/data/pg_hba.conf
host    all             all             192.168.17.220/24               trust
host    all             all             192.168.17.221/24               trust
#host   all             all             0.0.0.0/0               trust
将备份的数据,导入进单独部署的postgresql中
## 创建数据库
postgres=# CREATE DATABASE registry;
postgres=# CREATE DATABASE notaryserver;
postgres=# CREATE DATABASE notarysigner;
将harbor服务器的导出的SQL拷贝到本机
scp -r 192.168.17.220:/opt/harbor/postgresql_export /opt/postgresql_export
notaryserver.sql                                                                                        100%  491   213.2KB/s   00:00
notarysigner.sql                                                                                        100%  491   281.3KB/s   00:00
registry.sql                                                                                            100%  101KB  19.7MB/s   00:00
导入数据
##
psql -h localhost -U postgres -p 5432 -d registry -f registry.sql
psql -h localhost -U postgres -p 5432 -d notaryserver -f notaryserver.sql
psql -h localhost -U postgres -p 5432 -d notarysigner -f notarysigner.sql -U 数据库用户-p 访问端口-f 指定文件,和 < 功能一样-h 指定数据库地址-d 指定数据库名
4. 安装nginx
rpm -Uvh http://nginx.org/packages/centos/7/noarch/RPMS/nginx-release-centos-7-0.el7.ngx.noarch.rpm
yum install -y nginx
配置nginx.conf
[root@k8s-harbor-lb-01 ~]# cat /etc/nginx/nginx.conf
...include /etc/nginx/conf.d/*.conf;upstream harborsvr {server 192.168.17.220:80 weight=2;server 192.168.17.221:80 weight=1;}server {listen 80;server_name 192.168.17.225;location / {proxy_pass http://harborsvr;}}
}
启动
systemctl start nginx
systemctl status nginx
systemctl enable nginx
5. 安装nfs
yum install -y nfs-utils# 编辑/etc/exports文件
/data *(rw,no_root_squash)chmod 777 -R /datasystemctl start nfs-server
systemctl enable nfs-servermdkir /data/
mount -t nfs `hostname`:/data/ /data/
6. 安装redis
yum install epel-release -y
yum install redis -y##
vim /etc/redis.conf
...
bind 0.0.0.0 # 设置所有主机可以连接
requirepass 123456 # 设置客户端连接密码
daemonize yes # 打开守护进程模式
...## 启动redis
systemctl start redis
systemctl enable redis
7. 部署harbor
我们将第2段中,部署的harbor进行修改配置文件
[root@k8s-harbor-01 harbor]# docker-compose down
编辑配置文件,需要更改的主要有以下几点:
1.hostname 改为主机ip或完全限定域名,不要使用127.0.0.1或localhost
2.https选项,如需要,指定crt和key的路径,若不需要,直接注释掉
3.harbor_admin_password,默认密码,可以更改
4.data_volume,数据默认存储位置,设计为共享路径
5.注释掉database模块 及 Clair模块
6.开启external_database 和 external_redis模块及正确配置其中参数
7.集群内所有harbor配置均一样,改一下hostname值即可
修改配置文件(经过后面挂掉之后,重新改的配置文件)
[root@k8s-harbor-01 harbor]# egrep -v '^$|^#|^  #' harbor.yml
hostname: harbor.xx.net
http:port: 80
https:port: 443certificate: /opt/harbor/certs/harbor-ca.crtprivate_key: /opt/harbor/certs/harbor-ca.key
harbor_admin_password: 123456
data_volume: /data
trivy:ignore_unfixed: falseskip_update: falseoffline_scan: falsesecurity_check: vulninsecure: false
jobservice:max_job_workers: 10
notification:webhook_job_max_retry: 10
chart:absolute_url: disabled
log:level: infolocal:# Log files are rotated log_rotate_count times before being removed. If count is 0, old versions are removed rather than rotated.rotate_count: 50# Log files are rotated only if they grow bigger than log_rotate_size bytes. If size is followed by k, the size is assumed to be in kilobytes.# If the M is used, the size is in megabytes, and if G is used, the size is in gigabytes. So size 100, size 100k, size 100M and size 100G# are all valid.rotate_size: 200M# The directory on your host that store loglocation: /var/log/harbor
_version: 2.7.0
external_database:harbor:host: 192.168.17.225port: 5432db_name: registryusername: postgrespassword: 123456ssl_mode: disablemax_idle_conns: 2max_open_conns: 0notary_signer:host: 192.168.17.225port: 5432db_name: notarysignerusername: postgrespassword: 123456ssl_mode: disablenotary_server:host: 192.168.17.225port: 5432db_name: notaryserverusername: postgrespassword: 123456ssl_mode: disable
external_redis:host: 192.168.17.225:6379password: 123456registry_db_index: 1jobservice_db_index: 2chartmuseum_db_index: 3chair_db_index: 4trivy_db_index: 5idle_timeout_seconds: 30
proxy:http_proxy:https_proxy:no_proxy:components:- core- jobservice- trivy
metric:enabled: falseport: 9090path: /metrics
upload_purging:enabled: trueage: 168hinterval: 24hdryrun: false
cache:enabled: falseexpire_hours: 24
启动harbor的过程中发现jobservice容器无法启动,怀疑是数据库连接失败
[root@k8s-harbor-01 harbor]# docker ps
CONTAINER ID   IMAGE                                  COMMAND                  CREATED        STATUS                             PORTS                                                                            NAMES
767ac8431315   goharbor/harbor-jobservice:v2.7.2      "/harbor/entrypoint.…"   18 hours ago   Restarting (2) 17 seconds ago                                                                                       harbor-jobservice
...
日志
[root@k8s-harbor-01 harbor]# docker logs 767
Appending internal tls trust CA to ca-bundle ...
find: '/etc/harbor/ssl': No such file or directory
Internal tls trust CA appending is Done.
2024-02-21T17:00:15Z [ERROR] [/pkg/registry/client.go:82]: Failed to parse REGISTRY_HTTP_CLIENT_TIMEOUT: strconv.ParseInt: parsing "": invalid syntax, use default value: 30m0s
2024-02-21T17:00:15Z [INFO] [/controller/artifact/annotation/parser.go:71]: the annotation parser to parser artifact annotation version v1alpha1 registered
2024-02-21T17:00:15Z [INFO] [/controller/artifact/processor/processor.go:59]: the processor to process media type application/vnd.wasm.config.v1+json registered
2024-02-21T17:00:15Z [ERROR] [/lib/config/config.go:81]: failed to get config manager
2024-02-21T17:00:15Z [ERROR] [/lib/config/config.go:81]: failed to get config manager
在harbor服务器安装postgresql客户端,
yum install https://download.postgresql.org/pub/repos/yum/reporpms/EL-7-x86_64/pgdg-redhat-repo-latest.noarch.rpm -y
yum install postgresql13 -y[root@k8s-harbor-01 harbor]# psql -U postgres -h 192.168.17.225 -p 5432
psql (13.14)
Type "help" for help.postgres=# \lList of databasesName     |  Owner   | Encoding |   Collate   |    Ctype    |   Access privileges
--------------+----------+----------+-------------+-------------+-----------------------notaryserver | postgres | UTF8     | en_US.UTF-8 | en_US.UTF-8 |notarysigner | postgres | UTF8     | en_US.UTF-8 | en_US.UTF-8 |postgres     | postgres | UTF8     | en_US.UTF-8 | en_US.UTF-8 |registry     | postgres | UTF8     | en_US.UTF-8 | en_US.UTF-8 |template0    | postgres | UTF8     | en_US.UTF-8 | en_US.UTF-8 | =c/postgres          +|          |          |             |             | postgres=CTc/postgrestemplate1    | postgres | UTF8     | en_US.UTF-8 | en_US.UTF-8 | =c/postgres          +|          |          |             |             | postgres=CTc/postgres
(6 rows)postgres=#
发现可以连接,注释掉缓存数据库redis配置,发现可以正常启动,说明是redis配置有问题
[root@k8s-harbor-01 harbor]# docker ps
CONTAINER ID   IMAGE                                  COMMAND                  CREATED              STATUS                        PORTS                                                                            NAMES
dccc714a7abe   goharbor/harbor-jobservice:v2.7.2      "/harbor/entrypoint.…"   About a minute ago   Up About a minute (healthy)                                                                                    harbor-jobservice
经过调查,原来是redis的password修改过,和默认的不匹配
 harbor1服务器配置完成,接下来配置harbor2服务器,相同配置,改下域名就可以了
[root@k8s-harbor-02 harbor]# grep hostname harbor.yml
# The IP address or hostname to access admin UI and registry service.
hostname: harbor2.xx.net
8. 修改nginx配置
由于我们安装的harbor通过http跳转到https访问,所以前面设置的nginx的负载均衡的配置需要进行修改,否则无法访问
[root@k8s-harbor-lb-01 nginx]# cat /etc/nginx/nginx.conf
...
http {include       /etc/nginx/mime.types;default_type  application/octet-stream;log_format  main  '$remote_addr - $remote_user [$time_local] "$request" ''$status $body_bytes_sent "$http_referer" ''"$http_user_agent" "$http_x_forwarded_for"';access_log  /var/log/nginx/access.log  main;sendfile        on;#tcp_nopush     on;keepalive_timeout  65;#gzip  on;include /etc/nginx/conf.d/*.conf;upstream harborsvrs {server 192.168.17.220:443 weight=2;server 192.168.17.221:443 weight=1;}server {listen 443;server_name 192.168.17.225;location / {proxy_pass https://harborsvrs/;proxy_set_header   Host $host;proxy_set_header   X-Real-IP $remote_addr;proxy_set_header   X-Forwarded-Proto $scheme;}}
}
修改后,重启nginx
9. docker登录harbor
[root@k8s-master-01 ansible]# docker login 192.168.17.225:443
Username: admin
Password:
Error response from daemon: Get "http://192.168.17.225:443/v2/": Get "https://harbor1.xx.net/service/token?account=admin&client_id=docker&offline_token=true&service=harbor-registry": dial tcp: lookup harbor1.xx.net on 8.8.8.8:53: no such host
解析不了harbor的域名,在没有DNS服务器的情况下,修改/etc/hosts文件
[root@k8s-master-01 ansible]# cat /etc/hosts
...
192.168.17.220 k8s-harbor-01.xx.net harbor1 harbor1.xx.net
192.168.17.221 k8s-harbor-02.xx.net harbor2 harbor2.xx.net
登录
[root@k8s-master-01 ansible]# docker login 192.168.17.225:443
Username: admin
Password:
WARNING! Your password will be stored unencrypted in /root/.docker/config.json.
Configure a credential helper to remove this warning. See
https://docs.docker.com/engine/reference/commandline/login/#credentials-storeLogin Succeeded
由于推送的时候出现问题,笔者一直未能解决,所以将harbor回退到使用http协议
[root@k8s-master-01 ansible]# docker push harbor2.xx.net/alpine/alpine:latest
The push refers to repository [harbor2.xx.net/alpine/alpine]
d4fc045c9e3a: Layer already exists
unauthorized: unauthorized to access repository: alpine/alpine, action: push: unauthorized to access repository: alpine/alpine, action: push
10. harbor修改
[root@k8s-harbor-01 harbor]# head -20 harbor.yml
# Configuration file of Harbor# The IP address or hostname to access admin UI and registry service.
# DO NOT use localhost or 127.0.0.1, because Harbor needs to be accessed by external clients.
#hostname: harbor1.xx.net
hostname: 192.168.17.220# http related config
http:# port for http, default is 80. If https enabled, this port will redirect to https portport: 80# https related config
#https:# https port for harbor, default is 443
#  port: 443# The path of cert and key files for nginx
#  certificate: /opt/harbor/certs/harbor-ca.crt
#  private_key: /opt/harbor/certs/harbor-ca.key
修改harbor1和harbor2服务器的配置文件,并重启harbor
11. 修改nginx
http {include       /etc/nginx/mime.types;default_type  application/octet-stream;log_format  main  '$remote_addr - $remote_user [$time_local] "$request" ''$status $body_bytes_sent "$http_referer" ''"$http_user_agent" "$http_x_forwarded_for"';access_log  /var/log/nginx/access.log  main;sendfile        on;#tcp_nopush     on;keepalive_timeout  65;#gzip  on;include /etc/nginx/conf.d/*.conf;upstream harborsvrs {server 192.168.17.220:80 weight=2;server 192.168.17.221:80 weight=1;}server {listen 80;server_name 192.168.17.225;autoindex       on;location / {proxy_pass http://harborsvrs/;}}
}
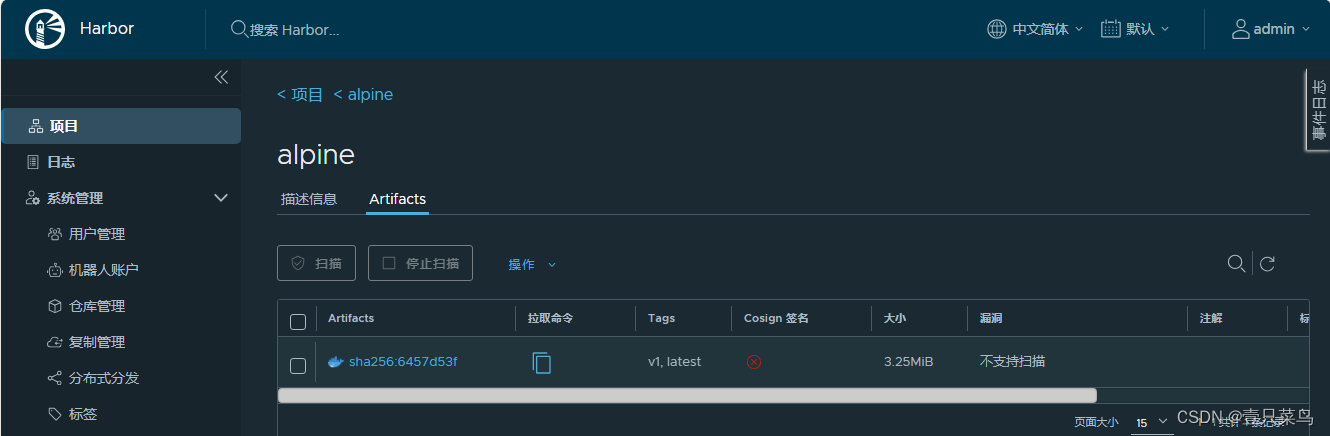
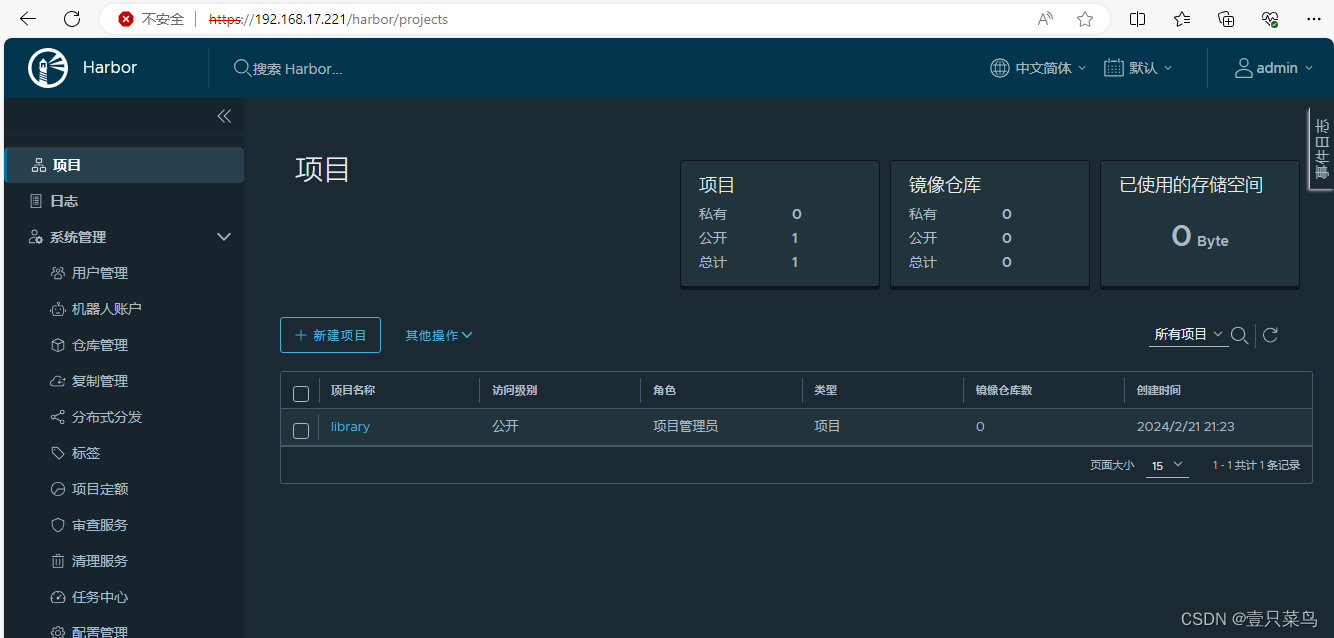
通过负载均衡可以访问harbor
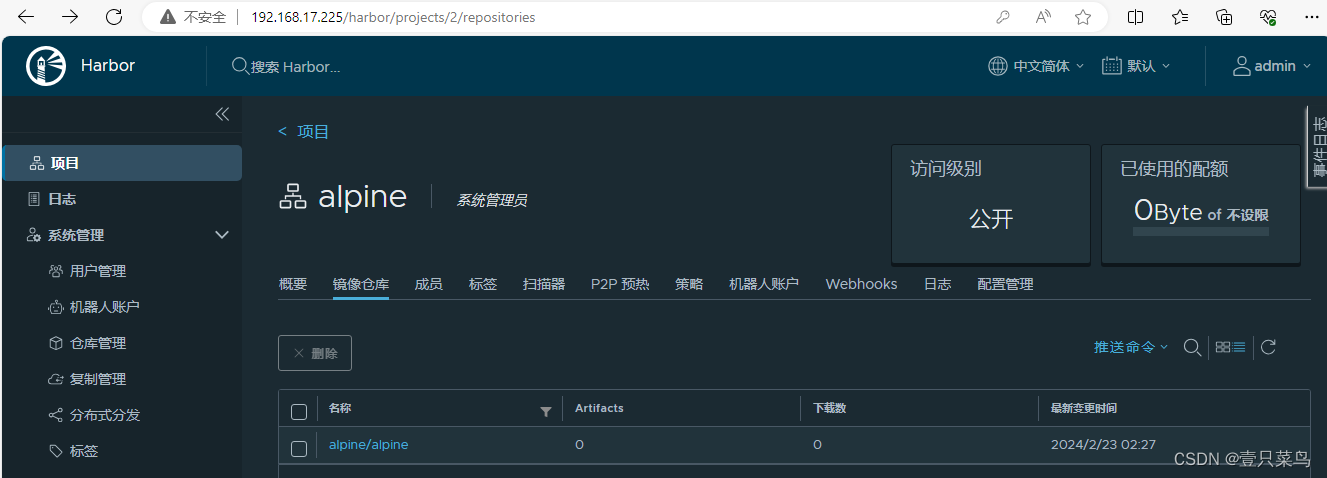
12. docker推送
[root@k8s-master-01 ansible]# docker login 192.168.17.221:80 -u admin
Password:
WARNING! Your password will be stored unencrypted in /root/.docker/config.json.
Configure a credential helper to remove this warning. See
https://docs.docker.com/engine/reference/commandline/login/#credentials-storeLogin Succeeded
[root@k8s-master-01 ansible]# docker tag alpine:latest 192.168.17.221:80/alpine/alpine:v1
[root@k8s-master-01 ansible]# docker push 192.168.17.221:80/alpine/alpine:v1
The push refers to repository [192.168.17.221:80/alpine/alpine]
d4fc045c9e3a: Layer already exists
v1: digest: sha256:6457d53fb065d6f250e1504b9bc42d5b6c65941d57532c072d929dd0628977d0 size: 528
[root@k8s-master-01 ansible]# docker login 192.168.17.220:80 -u admin
Password:
WARNING! Your password will be stored unencrypted in /root/.docker/config.json.
Configure a credential helper to remove this warning. See
https://docs.docker.com/engine/reference/commandline/login/#credentials-storeLogin Succeeded
[root@k8s-master-01 ansible]# docker push 192.168.17.220:80/alpine/alpine:latest
The push refers to repository [192.168.17.220:80/alpine/alpine]
d4fc045c9e3a: Layer already exists
latest: digest: sha256:6457d53fb065d6f250e1504b9bc42d5b6c65941d57532c072d929dd0628977d0 size: 528
在其他服务器登录harbor后,也可以正常推送